Unit 2 : Basic Linux Commands

Unit 2 : Basic Linux Commands
2.1 Directory Navigation Commands (pwd, cd, mkdir, rmdir, ls, tree)
2.2 File Management Commands (cat, rm, cp, mv, touch)
2.3 File Permissions and Ownership (chmod, chgrp, chown, umask)
2.4 Common System Commands (who, whoami, man, echo, date, clear)
2.5 Text Processing Commands (head, tail, cut, sort, cmp, tr, uniq, wc, tee)
2.6 Introduction to Process
2.7 Process Control commands : ps, fg, bg, kill, sleep
2.8 Job Scheduling commands : at, batch, crontab.
NOTES
2.1 Directory Navigation Commands
In the Linux operating system, files and directories are organized in a hierarchical structure. Navigating through this structure is an essential skill for working efficiently in the terminal. The following are basic commands used for directory navigation:
1. pwd – Print Working Directory
Theory:
Displays the full path of the current directory you are in.
Useful to confirm your current location in the file system.


Explanation:
When you open a terminal, you are in a specific directory. The pwd command tells you the full path of your present directory from the root (/). This helps you know where you are in the system.
Example:


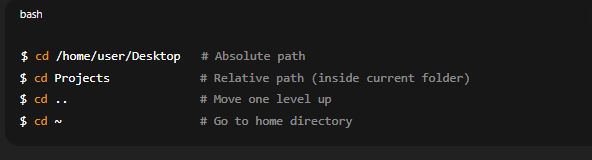
2. cd – Change Directory
Theory:
Used to move from the current directory to another directory.
Can be used with relative paths (based on current location) or absolute paths (from root
/).


Common Options:
cd ..– Go one level up (to the parent directory)cd /– Go to the root directorycd ~– Go to the home directorycd -– Go to the previous directory
Example:

3. mkdir – Make Directory
Theory:
Creates a new folder (directory) at a specified location.
You can create single or multiple directories at once.


Options:
mkdir -p path/dir1/dir2– Creates nested directories at once
Example:

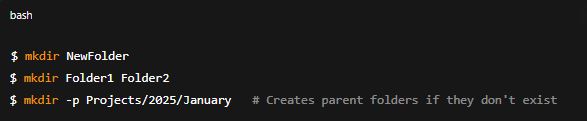
This will create a new folder named “Projects” in your current directory.
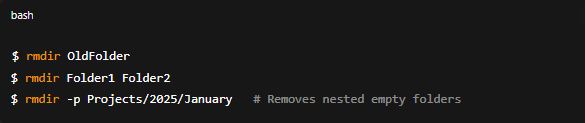
4. rmdir – Remove Directory
Theory:
Deletes empty directories.
Cannot remove directories that contain files or subfolders.


Note:
It will not remove directories that contain files or subdirectories.
Example:

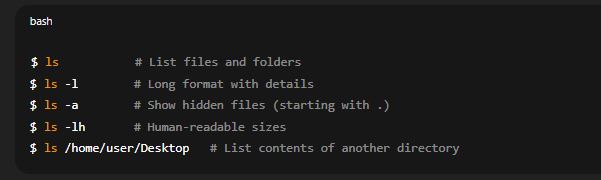
5. ls – List Directory Contents
Theory:
Shows files and folders in the current or specified directory.
Supports options to display hidden files, detailed info, sorting, etc.


Common Options:
ls -l– Detailed list (permissions, owner, size, date)ls -a– Show hidden files (those starting with.)ls -lh– Human-readable file sizesls /path– List contents of a specific directory
Example:

6. tree – Display Directory Structure
Theory:
Shows files and folders in a tree-like structure.
Helps visualize nested directories.
May need to be installed first (
sudo apt install treeon Ubuntu).


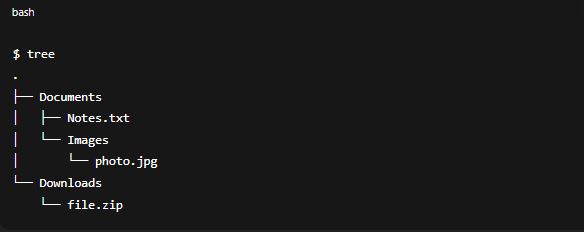
This command shows the nested structure of files and directories within “Documents”.
Note:
The tree command may need to be installed separately using:


✅ Summary Table
| Command | Full Form | Purpose |
|---|---|---|
pwd |
Print Working Directory | Shows current directory path |
cd |
Change Directory | Moves to another directory |
mkdir |
Make Directory | Creates a new directory |
rmdir |
Remove Directory | Deletes an empty directory |
ls |
List | Lists files and folders |
tree |
Tree Structure Display | Displays nested file structure |
2.2 File Management Commands
Managing files is a basic yet essential skill in any operating system environment, especially in Linux/Unix. The following commands are commonly used for creating, viewing, copying, moving, and deleting files.
1. cat – Concatenate and Display File Content
Theory:
The
catcommand is used to view the contents of a file on the terminal.It can also be used to combine multiple files into one.
Supports options to display line numbers, append content to another file, etc.
Reads files sequentially and writes them to standard output (screen).
Common Uses:
Display file contents
Merge multiple files
Create small text files quickly
Practical Examples:

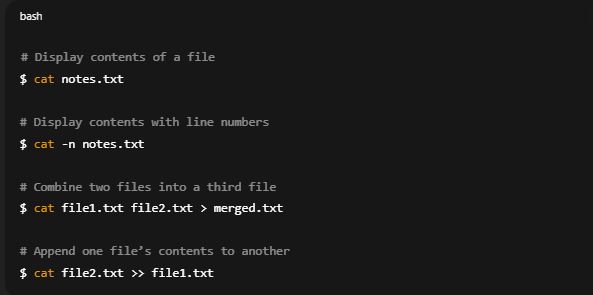
Other Uses:
Create a new file:


Combine multiple files:


Example:


2. rm – Remove Files
Theory:
Deletes files permanently (they cannot be recovered from the terminal without backup).
Needs extra caution because there’s no recycle bin confirmation.
Supports removal of directories with recursive deletion.
Common Uses:
Remove unwanted files
Delete multiple files at once
Practical Examples:

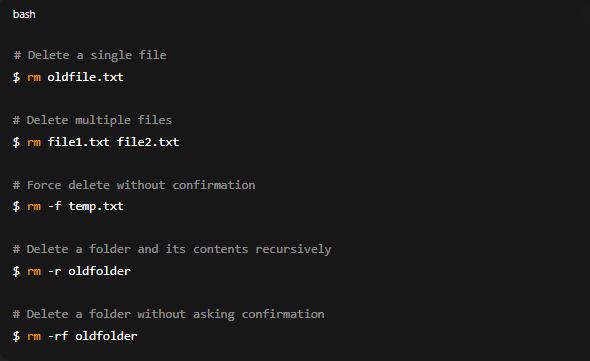
Common Options:
rm -r foldername– Remove a directory and its contentsrm -f file.txt– Force delete without confirmationrm -rf *– Delete all files and folders in the current directory (use with caution)
Example:


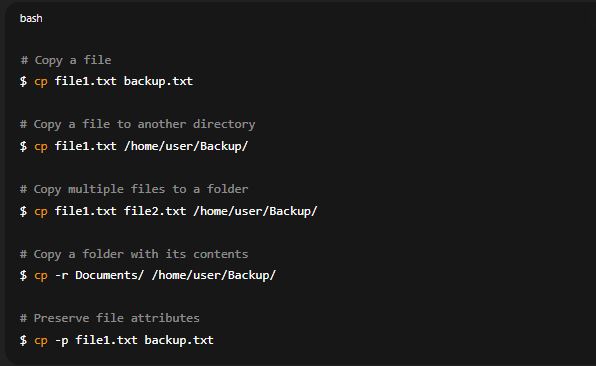
3. cp – Copy Files and Directories
Theory:
Creates a duplicate copy of a file or folder from one location to another.
Supports recursive copy for directories.
Can be used with options to preserve file permissions and timestamps.
Common Uses:
Backup files
Duplicate data
Copy configuration files
Practical Examples:


Common Options:
cp file1.txt /home/user/Docs/– Copy file to another foldercp -r dir1/ dir2/– Copy an entire folder recursively
Example:

4. mv – Move or Rename Files
Theory:
Moves a file or folder from one location to another.
Can also be used to rename files or folders.
Unlike
cp, it does not keep the original copy; it simply changes location or name.
Common Uses:
Rename files/folders
Organize files by moving them to appropriate directories
Practical Examples:


Examples:
Rename a file:

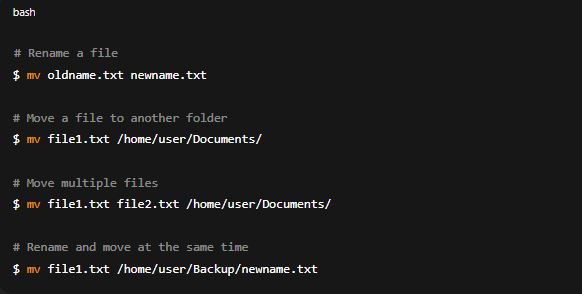
Move a file to another directory:


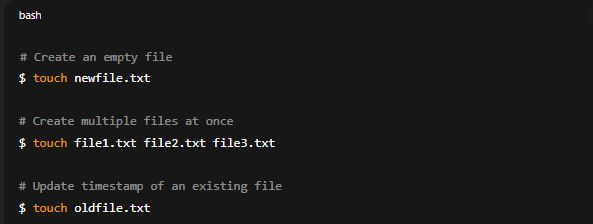
5. touch – Create Empty Files / Update Timestamps
Theory:
Creates an empty file if it doesn’t already exist.
If the file exists, updates the last modified and access time.
Useful for quickly creating placeholder files.
Common Uses:
Create empty text files
Update file timestamps
Generate test files for scripting
Practical Examples:


Example:

✅ Summary Table
| Command | Purpose | Common Use Example |
|---|---|---|
cat |
View, combine, or create files | cat file.txt |
rm |
Delete files or directories | rm -r foldername/ |
cp |
Copy files or folders | cp file1.txt backup/ |
mv |
Move or rename files | mv old.txt new.txt |
touch |
Create empty files or update time | touch newfile.txt |
Unit 2.3: File Permissions and Ownership
File Permissions and Ownership in Linux
In Linux, file permissions control who can read, write, or execute a file, and ownership determines who controls a file or directory.
These permissions and ownership rules are essential for security, privacy, and system stability.
Linux assigns three types of users to each file:
Owner: The user who created the file.
Group: A group of users who can share file access.
Others: Everyone else on the system.
And three types of permissions:
Read (r) – View file content or list directory.
Write (w) – Modify file or directory.
Execute (x) – Run the file (if it’s a script/program) or access directory.
1. chmod – Change File Permissions
Theory
The
chmodcommand changes the permissions of a file or directory.Permissions are given to three categories:
Owner (u) – The person who created the file.
Group (g) – Users who belong to the same group as the file owner.
Others (o) – All other users.
Permission types:
r – Read (view file contents or list directory)
w – Write (modify file or directory contents)
x – Execute (run file as program or enter directory)
Two Methods to Set Permissions:
Symbolic method – Uses letters (
u,g,o,a,+,-,=).Numeric method – Uses octal numbers:
4= Read2= Write1= ExecuteSum values for combination (e.g.,
7= Read + Write + Execute).
Practical Examples


Two Modes of chmod:
✅ Symbolic Mode:


u= user (owner),g= group,o= others,a= all+adds permission,-removes,=sets exact permission
✅ Numeric (Octal) Mode:


r=4,w=2,x=1→ 7 = rwx, 5 = r-x755means: owner=rwx, group=r-x, others=r-x


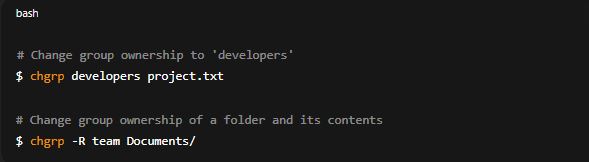
2. chgrp – Change Group Ownership
Theory
The
chgrpcommand changes the group ownership of a file or directory.Useful when multiple users work in the same group and need shared access.
Requirements:
You must be the owner of the file or have root privileges.
Practical Examples


Example:

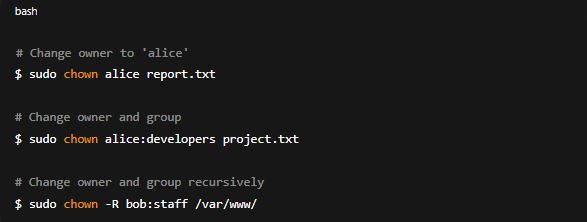
3. chown – Change File Owner and Group
Theory
The
chowncommand changes the owner and/or group of a file.Requires root privileges for changing ownership to another user.
Formats:
chown owner filechown owner:group filechown :group file(only change group)
Practical Examples


Examples:

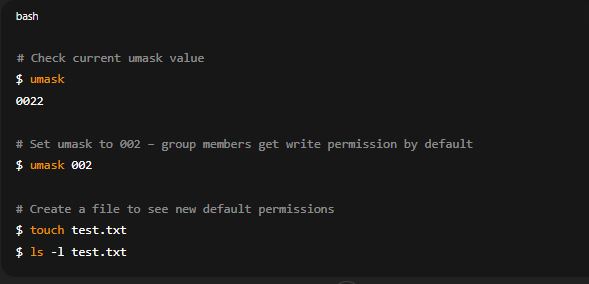
4. umask – Set Default Permissions
Theory
The
umask(user file creation mask) sets the default permissions for newly created files and directories.It works by removing permissions from the system’s default.
Default permissions before applying umask:
Files:
666(rw-rw-rw-) – no execute bit for security.Directories:
777(rwxrwxrwx).
umask value is subtracted from default to determine final permissions.
Example:
Default for files =
666umask =
022Result =
644(rw-r–r–)
Practical Examples


Example:


Means:
File: 666 – 022 = 644 (rw-r–r–)
Directory: 777 – 022 = 755 (rwxr-xr-x)
To view current umask:

✅ Summary Table
| Command | Purpose | Example Usage |
|---|---|---|
chmod |
Change permissions | chmod 755 file.sh |
chgrp |
Change group ownership | chgrp staff notes.txt |
chown |
Change file owner and group | chown user:group report.pdf |
umask |
Set default permissions for new files | umask 022 |
Common System Commands in Linux
Linux provides many system commands that help users interact with the operating system, get system information, and perform basic operations quickly.
Here we cover six important commands: who, whoami, man, echo, date, and clear.
1. who – Show Logged-In Users
Theory
Displays a list of users who are currently logged into the system.
Also shows details like terminal name, login time, and sometimes the IP address (if connected remotely).
Useful for system administrators to check active sessions.
Practical Examples

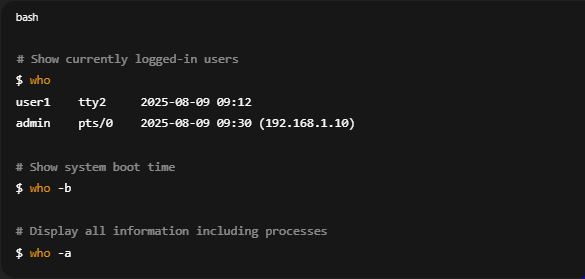
Explanation:
This command lists all users currently using the system. It provides details like username, terminal name, login time, and sometimes the IP address or hostname if accessed remotely.
Example:


OUTPUT


2. whoami – Show Current Username
Theory
Displays the username of the person who is currently executing commands.
Helpful when working in multiple user accounts or using
sudoto confirm the current identity.
Practical Examples

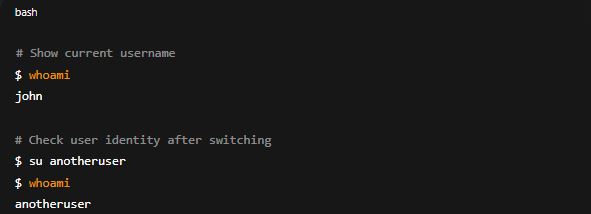
Explanation:
This command is especially useful in multi-user environments. It helps verify the identity of the currently logged-in user, especially when working with different user accounts.
Example:


Output


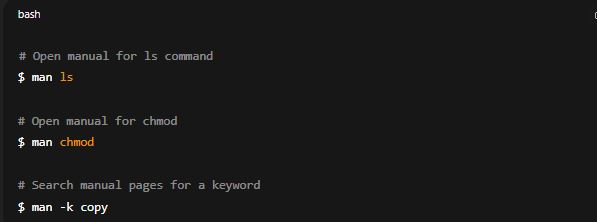
3. man – Manual Pages
Theory
Stands for manual.
Displays detailed documentation (help) about Linux commands, options, syntax, and usage.
Divided into sections such as:
User commands
System calls
Library functions
Special files
Navigation inside
man:Use arrow keys to scroll
Press
qto quit
Practical Examples

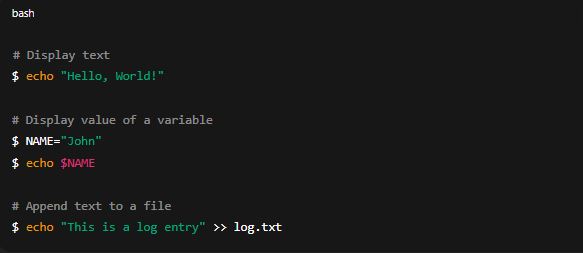
4. echo – Display Text or Variables
Theory
Prints text or variable values to the terminal.
Often used in shell scripts to display messages or results.
Can also be used to append text to files.
Practical Examples

5. date – Display or Set System Date and Time
Theory
Displays the current system date and time.
Can format the output in different styles.
Requires root privileges to change the system time.
Practical Examples


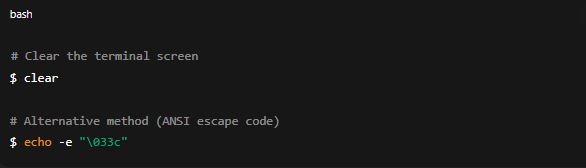
6. clear – Clear the Terminal Screen
Theory
Clears all visible text from the terminal window.
Does not delete command history — you can still scroll up to see previous commands.
Helpful for keeping the workspace clean.
Practical Examples

Summary Table
| Command | Purpose | Example |
|---|---|---|
| who | Show logged-in users | who -a |
| whoami | Show current username | whoami |
| man | View manual/help pages | man chmod |
| echo | Print text or variables | echo "Hello" |
| date | Display/set date and time | date +"%d-%m-%Y" |
| clear | Clear terminal screen | clear |
Text Processing Commands in Linux
Text processing commands are used to view, manipulate, analyze, and transform text files directly from the terminal without opening them in a text editor.
They are extremely useful for log analysis, data extraction, and automation scripts.
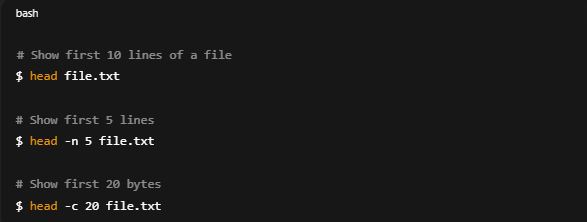
1. head – Display First Few Lines of a File
Theory
Displays the first 10 lines of a file by default.
Useful for quickly previewing the start of large files.
Can specify a custom number of lines.
Practical Examples
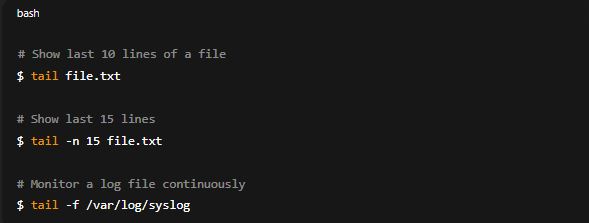
2. tail – Display Last Few Lines of a File
Theory
Shows the last 10 lines of a file by default.
Often used to monitor log files in real time with
-foption.
Practical Examples

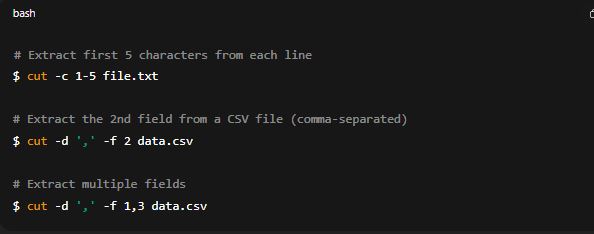
3. cut – Extract Specific Columns or Fields
Theory
Extracts portions of each line from a file or input.
Works with delimiters or fixed character positions.
Commonly used for extracting CSV/TSV fields.
Practical Examples

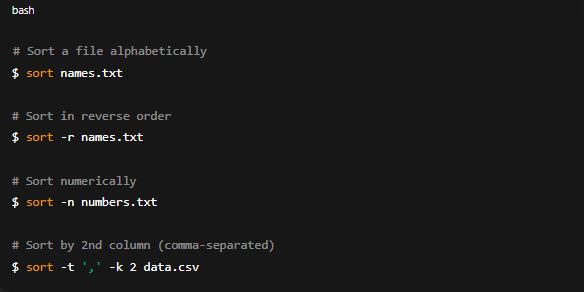
4. sort – Arrange Lines in Order
Theory
Sorts lines of text files alphabetically or numerically.
Supports reverse sorting, case-insensitive sorting, and sorting based on specific fields.
Practical Examples

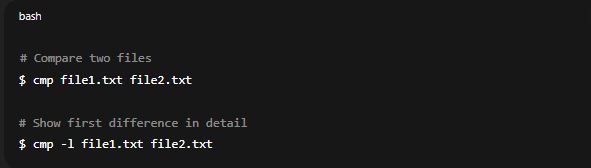
5. cmp – Compare Two Files Byte by Byte
Theory
Compares two files and reports the first difference found.
If no output is shown, the files are identical.
Faster for checking equality than
diff.
Practical Examples

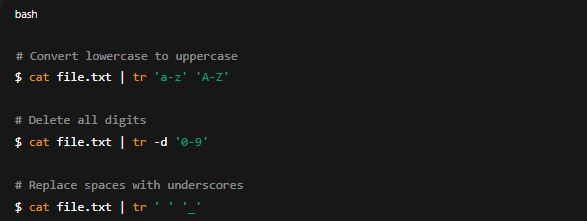
6. tr – Translate or Delete Characters
Theory
Replaces characters, squeezes repeated characters, or deletes characters from input.
Works only with standard input/output, so it’s often used with pipes.
Practical Examples

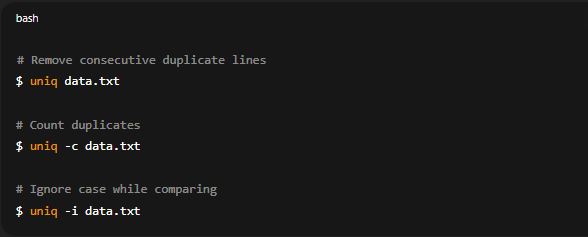
7. uniq – Remove Duplicate Lines
Theory
Removes adjacent duplicate lines from a file.
Often used after
sortbecause it only removes consecutive duplicates.Can count occurrences of each line.
Practical Examples

8. wc – Word, Line, and Character Count
Theory
Displays number of lines, words, and characters in a file.
Useful for quick text statistics.
Practical Examples


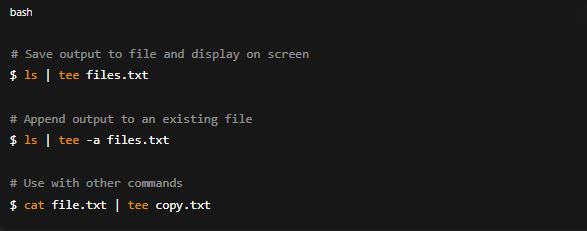
9. tee – Read from Input and Write to File
Theory
Reads standard input and writes it both to the terminal and to a file.
Useful for logging command output while still viewing it in real-time.
Practical Examples

Summary Table
| Command | Purpose | Example |
|---|---|---|
| head | Show first lines of a file | head -n 5 file.txt |
| tail | Show last lines of a file | tail -n 10 file.txt |
| cut | Extract specific fields | cut -d ',' -f 2 data.csv |
| sort | Sort lines alphabetically/numerically | sort -n numbers.txt |
| cmp | Compare two files byte-by-byte | cmp file1.txt file2.txt |
| tr | Translate/delete characters | tr 'a-z' 'A-Z' |
| uniq | Remove duplicate lines | uniq -c data.txt |
| wc | Count lines, words, chars | wc -l file.txt |
| tee | Write to file and display output | ls | tee output.txt |
Introduction to Process in Linux
1. What is a Process?
A process is an instance of a program that is being executed by the operating system.
When you run any command or program, the OS creates a process to manage its execution.
A process has:
Program Code – The instructions to be executed.
Current Activity – The state of execution (e.g., running, waiting).
Resources – CPU time, memory, open files, etc.
Unique Identifier – Called PID (Process ID).
Example:
If you run firefox, the OS starts a Firefox process with its own memory, CPU usage, and PID.
2. Process Types
Processes can be broadly categorized into:
Foreground Process
Runs in the terminal and takes input directly from the user.
Blocks the terminal until it finishes.
Example:


Background Process
Runs in the background without blocking the terminal.
Often ends with
&symbol when started.
Example:


Daemon Process
Background services started at boot time.
Runs without direct user interaction.
Example:sshd,cron
Zombie Process
Process that has completed execution but still remains in the process table because its parent hasn’t read its exit status.
Process States
A process in Linux can be in one of several states:
Running (R) – Currently executing.
Sleeping (S) – Waiting for an event to occur.
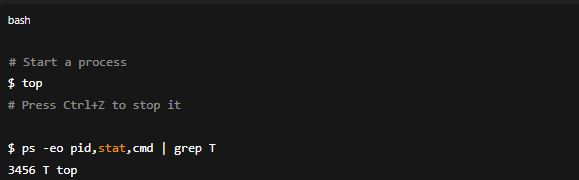
Stopped (T) – Suspended by a signal.
Zombie (Z) – Finished but not removed from the process table.
Process States in Linux (Detailed)
In Linux, a process can be in different states depending on what it’s currently doing and whether it’s waiting for something.
These states are shown when using commands like ps or top under the STAT column.
1. Running (R)
Meaning
The process is actively using the CPU or is ready to use it.
If the CPU is busy, a “ready” process waits in the run queue until scheduled.
Key Points
Only one process per CPU core can be truly running at a time; others wait their turn.
Processes in the running state can move to the sleeping state if they need input/output.
Example
2. Sleeping (S)
Sleeping is divided into two subtypes:
Interruptible Sleep (
S) – The process is waiting for an event (like keyboard input or file availability) and can be woken up by a signal.Uninterruptible Sleep (
D) – The process is waiting for I/O (disk/network) and cannot be interrupted until the I/O completes.
Meaning
The process is not actively running but is waiting for something to happen (e.g., data from a file, user input, or a network packet).
Key Points
Most processes spend the majority of their time in sleeping state.
Reduces CPU usage while waiting.
Example


3. Stopped (T)
Meaning
The process is paused and not executing.
This can happen due to:
A signal sent to stop it (e.g.,
SIGSTOP).The user pressing Ctrl+Z in the terminal.
Key Points
Can be resumed later using the
fgorbgcommand.Useful for temporarily halting a process without killing it.
Example

4. Zombie (Z)
Meaning
A process that has completed execution but still has an entry in the process table.
This happens because the parent process hasn’t read the child’s exit status yet.
Key Points
Also called a “defunct process”.
Doesn’t use CPU or memory (other than minimal process table space).
Gets removed automatically when the parent collects its status.
Example


4. Process Identification
PID (Process ID): A unique number given to every process.
PPID (Parent Process ID): The PID of the process that started it.
Check PID:

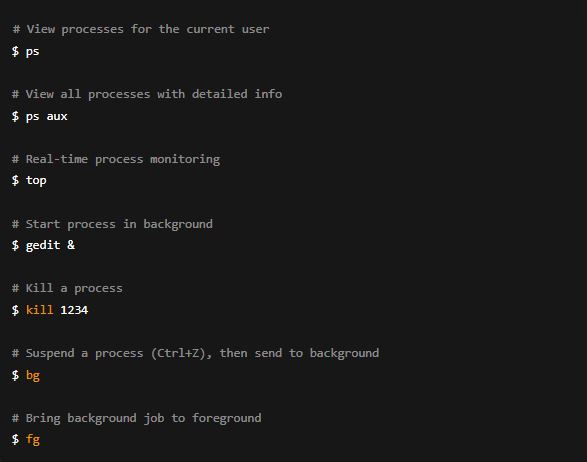
5. Common Process Management Commands
| Command | Purpose | Example |
|---|---|---|
| ps | View running processes | ps aux |
| top | Show real-time process usage | top |
| kill | Terminate process by PID | kill 1234 |
| killall | Kill all processes with a name | killall firefox |
| bg | Resume job in background | bg %1 |
| fg | Bring job to foreground | fg %1 |
| jobs | Show jobs running in current terminal | jobs |

Life Cycle of a Process in Linux
In Linux (and Unix-like systems), a process is simply a running program. The life cycle of a process describes the stages it goes through from its creation to its termination.
1. Created (New State)
What happens here?
A process is created by another process using a system call such as
fork()in Unix/Linux.The new process is called a child process, and the process that created it is the parent process.
In this stage, resources like memory space and process ID are allocated.
Example in Linux:


2. Ready State
What happens here?
The process is ready to run but is waiting for CPU time.
It has all necessary resources except the CPU.
The scheduler decides when it will get CPU time.
Example:


3. Running State
What happens here?
The CPU is actively executing the instructions of the process.
Only one process per CPU core can be in the running state at a given moment.
Processes may run in user mode or kernel mode.
Example:


4. Waiting (Blocked) State
What happens here?
The process is paused because it is waiting for an event such as:
Input from the user
Disk read/write completion
Network response
There are two types of waiting:
Interruptible sleep (S) – can be woken up by a signal.
Uninterruptible sleep (D) – cannot be interrupted until the resource is available.
Example:


5. Terminated (Exit) State
What happens here?
The process has finished execution and is removed from the system’s memory.
Its resources are released.
If the parent process has not yet read its exit status, the process becomes a zombie temporarily.
Example:

Process Life Cycle Diagram


8. Importance of Process Management
Prevents CPU overload.
Ensures fair resource distribution.
Allows multiple programs to run simultaneously.
Helps in troubleshooting system issues.
Process Control Commands in Linux
In Linux/Unix, process control commands are used to view, manage, and manipulate processes. A process is simply a running program, and each process is assigned a Process ID (PID) for identification.
The following are some important commands used for process control:
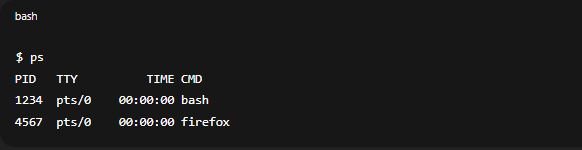
1. ps – Process Status
Theory:
The
pscommand displays information about active processes.It can show processes for the current terminal or all processes in the system.
Output includes:
PID – Process ID
TTY – Terminal associated with the process
TIME – CPU time consumed
CMD – Command used to start the process
Useful for checking which processes are running and getting their PIDs.
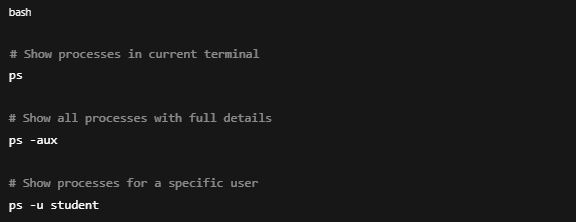
Common Options:
ps→ shows processes running in the current shell.ps -eorps -A→ shows all processes.ps -u <username>→ shows processes owned by a user.ps -aux→ shows detailed info of all processes.
Practical Examples:

2. fg – Bring Job to Foreground
Theory:
fgis used to bring a background job back to the foreground.It works with job control — processes started from the current shell.
The job is identified by job ID (not PID), shown when you run jobs in the background.
Practical Example:

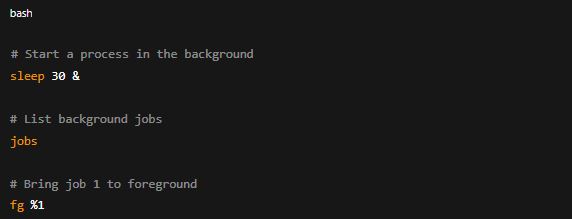
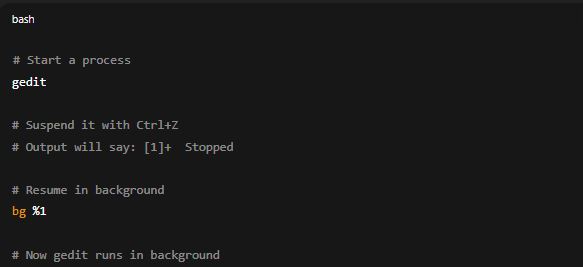
3. bg – Resume Job in Background
Theory:
bgresumes a suspended job in the background.A suspended job is created when you stop it with CTRL+Z.
Useful when you want the process to continue running without blocking the terminal.
Practical Example:

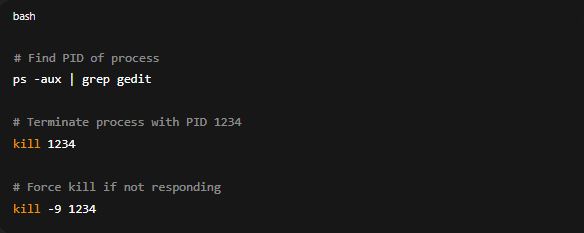
4. kill – Terminate a Process
Theory:
killsends signals to processes.Most common signal: SIGTERM (15) – requests process termination.
Another signal: SIGKILL (9) – forcefully kills a process (cannot be caught).
You need the PID from
psortopto kill a process.
Practical Example:

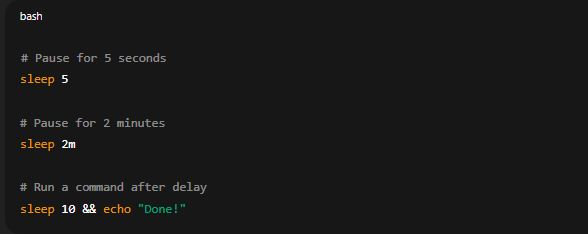
5. sleep – Delay Execution
Theory:
sleeppauses execution for a given amount of time.Time can be in seconds (default), minutes (
m), hours (h), or days (d).Often used in shell scripts to delay tasks.
Practical Example:

Job Scheduling Commands in Linux
Linux allows you to execute commands or scripts automatically at a specific time or at repeated intervals without manual intervention.
The main commands for job scheduling are:
at→ Runs a job once at a specified time in the future.batch→ Runs a job once when the system load is low.crontab→ Runs jobs periodically at scheduled intervals.
1. at Command
Theory
The
atcommand is used to schedule a command or script one time in the future.Time can be specified in formats like:
Exact time:
10:30Relative:
now + 2 hours,midnight,noon, etc.
Requires the
atd(at daemon) service to be running.
1. at Command – One-Time Scheduled Jobs
1.1 What is at?
Executes a command or script only once at a specific time in the future.
Think of it like setting an alarm: it rings once and then stops.
Requires the
atddaemon to be running in the background.
1.2 Time Formats Supported
You can specify:
Exact Time →
10:30(today’s 10:30 AM or PM depending on current time)Relative Time →
now + 2 hours,now + 3 daysKeywords →
midnight,noon,teatime(4 PM)Date + Time →
5pm 12 Aug,10:00 2025-08-12
Syntax

2. batch Command
Theory
Similar to
at, but executes commands only when system load is low.Useful for background tasks that should not slow down the system during high usage.
The load threshold is usually defined in
/etc/at.denyor/etc/at.allow.
2. batch Command – One-Time Jobs on Low Load
2.1 What is batch?
Similar to
at, but jobs are executed only when the system load is low (default: load average < 0.8 × number of CPUs).Useful for heavy tasks that should not affect performance during busy times.
Syntax


3. crontab Command
Theory
Used to automate recurring tasks (daily, weekly, monthly, etc.).
Works using the cron daemon (
crond).Jobs are defined in a crontab file with time/date fields:
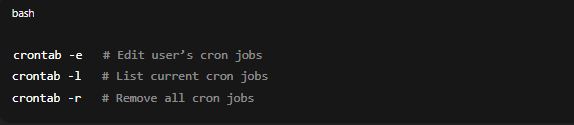
3. crontab Command – Recurring Jobs
3.1 What is crontab?
Runs tasks repeatedly at fixed intervals (minutes, hours, daily, weekly, monthly, etc.).
Controlled by the cron daemon (
crond).Each user can have their own crontab file.
3.2 Crontab Time Format
A crontab entry has 5 fields followed by the command:
3.3 Syntax